Skip to content

Cart

Your cart is empty

All Blogs - Toys Quiz

STEM

Looking for more inspiration? Here, you'll discover fun ideas, find the perfect DIY building kits for you, and stay updated with all the latest news!

Choose a topic

10 Easy STEM Night Activities for Kids and Families

10 Easy STEM Night Activities for Kids and Families

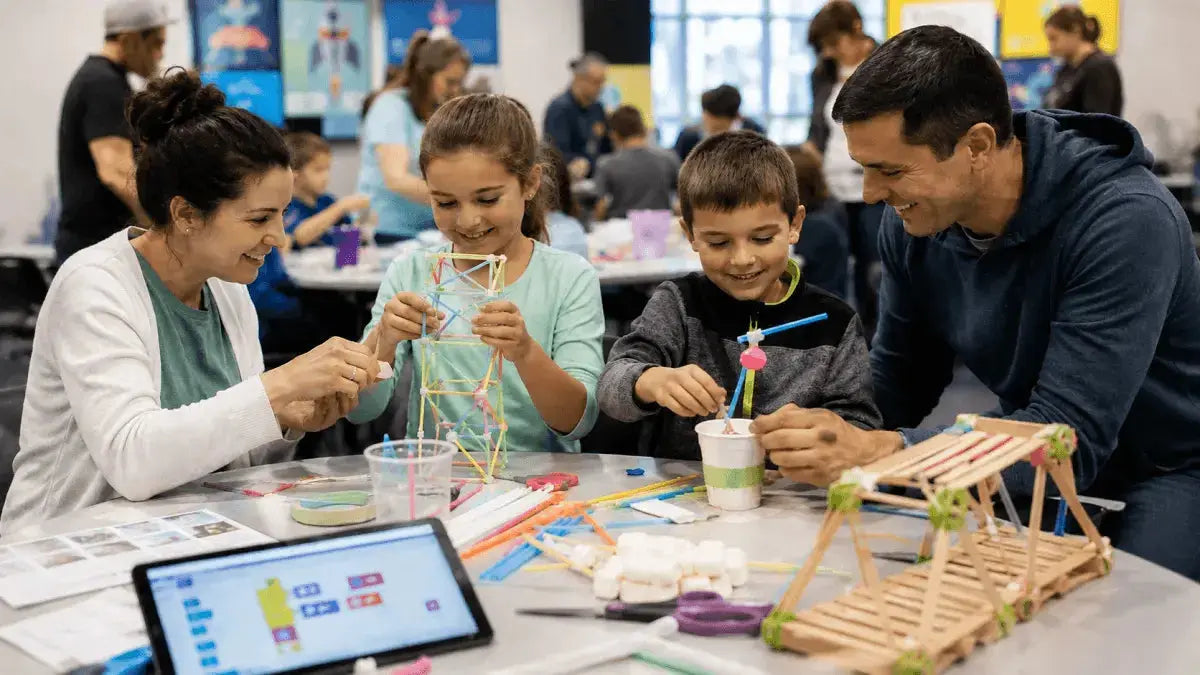
A successful STEM night turns science, technology, engineering and mathematics into something children can touch, test and improve. Instead of watching a demonstration, families work together to build towers, protect falling eggs, race balloon rockets, test bridges and solve coding challenges. The ten STEM night activities below use affordable materials and work well for schools, libraries, community groups and family evenings at home. Each activity includes a suggested age range, approximate station time, materials, instructions and the STEM ideas children explore. You do not need expensive equipment or a science laboratory. A well-organised table, a clear challenge and enough time for children to try again can create a memorable learning experience. In this article: What Is a STEM Night? How to Plan a Successful STEM Night 10 Easy STEM Night Activities for Kids and Families 1. Construct the Tallest Tower 2. Egg Drop Challenge 3. Balloon Rocket Race 4. Paper Airplane Competition 5. Marshmallow and Toothpick Structures 6. DIY Weather Station 7. Straw Bridge Challenge 8. Coding Challenge Station 9. Marble Run Engineering Challenge 10. Design a Parachute How to Make STEM Night More Interactive STEM Night Safety Checklist Frequently Asked Questions Conclusion What is a STEM night? A STEM night is a hands-on event where children and adults explore science, technology, engineering and mathematics together. It may be organised by a school, library, museum, homeschool group or community centre, or adapted into a smaller family activity night at home. The strongest STEM nights focus on investigation rather than perfect results. Children make a prediction, build or test an idea, observe what happens and decide what to change. Adults participate as teammates and question-askers instead of completing the challenge for them. This approach helps children connect classroom concepts to real objects and everyday problems. It also makes space for creativity: two families can receive the same materials and produce completely different solutions. How to plan a successful STEM night For a school or community event, choose four to six stations for a 60- to 90-minute session. Families can spend approximately 10 to 15 minutes at each table. A home STEM night can use one longer challenge or two short activities. 1. Choose activities for your age range Select challenges that younger children can enter easily but older children can extend. For example, a six-year-old can build a paper tower, while an older child can work under a material limit or test how much weight the tower supports. 2. Test every station beforehand Run each activity using the exact materials participants will receive. This reveals unclear instructions, weak tape, missing tools and unrealistic time limits before families arrive. 3. Prepare one tray per team Place the materials for each group in a tray, bag or box. Label shared tools clearly and keep replacement supplies behind the station. Pre-cutting string and tape can prevent queues. 4. Display the challenge, not the solution Each station sign should explain the goal, material rules, time limit and testing method. Avoid showing one “correct” finished model because it can cause every team to copy the same design. 5. Ask volunteers to guide with questions Useful prompts include: “What do you predict?”, “What changed?”, “Why do you think that happened?” and “What would you try next?” These questions keep children in charge of the thinking. 6. Celebrate improvement A STEM passport, completion sticker or simple certificate can encourage participation without making every station about winning. Recognise creative designs, careful observations, teamwork and successful redesigns as well as distance, height or strength. 10 easy STEM night activities for kids and families These activities can be run as individual stations or combined into one complete family STEM night. Adjust materials and difficulty to suit the ages, abilities and supervision available at your event. 1. Construct the tallest tower Best for: Ages 6–12 Station time: 12–15 minutes STEM focus: Structural engineering, balance and measurement Materials: Paper, drinking straws, index cards, masking tape, scissors, ruler and a timer. Give every team the same number of straws, sheets of paper and length of tape. Explain that the tower must stand without being held or attached to the table. Allow two minutes for planning and ten minutes for building. When time ends, check that each tower stands independently for at least ten seconds. Measure from the table to the tower’s highest stable point. What children learn: Wide bases, triangular supports and a low centre of mass often improve stability. Children also discover that the tallest first attempt may not be the strongest design. Extension: Add a second test by placing coins on top of each tower. Ask teams to redesign for both height and load-bearing strength. 2. Egg drop challenge Best for: Ages 7–13 Station time: 20–30 minutes STEM focus: Impact forces, energy absorption and engineering design Materials: Eggs, paper cups, cardboard, paper, straws, cotton, elastic bands, string, masking tape, plastic bags and a washable ground covering. Give each team one egg and the same selection of protective materials. Ask teams to design a container that reduces the force reaching the egg. Choose one safe drop height and mark a testing area where spectators must remain behind a line. Drop each design using the same method and record whether the egg remained intact. Invite teams to identify which features absorbed impact and what they would change. What children learn: Padding, crumple zones, air resistance and force distribution can all reduce impact. The activity also introduces fair testing because every design should be dropped from the same height. Less-mess option: Use reusable plastic eggs containing a small clay ball. Flattened clay shows how strongly the container hit the ground. Safety: An adult should control the drop zone. Clean hands and surfaces after handling raw eggs, and check for food allergies before the event. 3. Balloon rocket race Best for: Ages 6–12 Station time: 10–15 minutes STEM focus: Force, motion, air pressure and variables Materials: Balloons, long string, drinking straws, tape, clips and two secure attachment points. Thread a straw onto each string and pull the strings tight across the room. Inflate a balloon without tying it and close the neck with a clip. Tape the balloon lengthwise to the straw with its opening facing backwards. Release the clip and observe the balloon travel along the string. Repeat with different balloon sizes or amounts of air while changing only one variable at a time. What children learn: Air pushed backwards creates a force that moves the balloon forwards. Teams can compare how balloon size, inflation and string tension affect speed and distance. Extension: Add paper fins or a lightweight cargo cup and investigate whether the rocket still travels the full distance. Safety: Ask about latex allergies and keep uninflated or broken balloons away from young children. Adults should remove balloon pieces immediately. 4. Paper airplane competition Best for: Ages 6 and older Station time: 15–20 minutes STEM focus: Aerodynamics, measurement and fair testing Materials: Identical sheets of paper, pencils, measuring tape, masking tape and an open launch area. Give each participant the same size and weight of paper. Allow children to choose or invent a folding design. Mark one launch line and give each plane three flights. Measure distance to the first point where the plane touches the ground. Record the best flight and invite one design change before another test. What children learn: Wing shape, symmetry, weight distribution and launch angle affect flight. Multiple trials also show why scientists repeat tests instead of relying on one result. Alternative awards: Recognise longest distance, longest airtime, most accurate landing and most improved design. 5. Marshmallow and toothpick structures Best for: Ages 6–12 with supervision Station time: 12–20 minutes STEM focus: Geometry, structural stability and three-dimensional design Materials: Mini marshmallows, toothpicks, trays, rulers and optional small weights. Ask children to build a cube and a triangular pyramid as warm-up shapes. Challenge each team to build the tallest structure or a bridge spanning a set distance. Encourage teams to compare square and triangular supports. Test the finished model with a light object or measure its unsupported span. Allow time to reinforce weak joints and test again. What children learn: Triangles resist changes in shape more effectively than unsupported squares. Children also practise spatial reasoning and see how repeated geometric units form larger structures. Safety: Toothpicks are sharp and require adult supervision. Treat the marshmallows as building materials rather than snacks once they have been handled. 6. Build a DIY weather station Best for: Ages 7–13 Station time: 20–30 minutes, followed by daily observations STEM focus: Weather, data collection, measurement and patterns Materials: Clear plastic bottle, ruler, waterproof marker, tape, card, pencil with eraser, drinking straw, compass and a shallow container with sand or stones. Choose one instrument for a short station or build several as a longer family project: Rain gauge: Cut and invert the top of a clear bottle to make a funnel, then mark a measurement scale on the side. Wind vane: Attach a card arrow to a straw balanced on a pencil point, then mark north, east, south and west. Weather journal: Record cloud cover, wind direction, temperature and rainfall at the same time each day. What children learn: Consistent measurement matters when comparing data over time. A week of observations can reveal patterns and create opportunities for graphs, averages and weather predictions. Safety: Adults should cut plastic bottles and smooth or cover sharp edges. Secure outdoor equipment so it cannot blow away. 7. Straw bridge challenge Best for: Ages 7–14 Station time: 20 minutes STEM focus: Structural engineering, load distribution and iterative testing Materials: Drinking straws, masking tape, scissors, two equal-height supports, paper cups and identical test weights. Place two supports a fixed distance apart to create the span. Give every team the same number of straws and length of tape. Require the bridge to rest on the supports without being taped to them. Place an empty cup at the centre, then add weights one at a time. Record the maximum load before the bridge bends, slips or collapses. What children learn: Triangular trusses, folded beams and weight distribution can strengthen a bridge. Failure becomes useful evidence showing where the next design needs reinforcement. Extension: Calculate efficiency by comparing the bridge’s load capacity with the number of straws used. 8. Coding challenge station Best for: Ages 6–14 Station time: 10–20 minutes STEM focus: Algorithms, sequencing, logic and debugging Materials: Tablets or laptops with an age-appropriate block-coding activity, task cards and headphones if sound is required. Choose a short task with a clear finish, such as moving a character through a maze. Ask children to predict the required instruction sequence before running it. Test the code and identify the first place the result differs from the plan. Change one instruction, run the code again and repeat until the task works. Invite partners to explain the algorithm to each other in ordinary language. What children learn: Coding depends on precise instructions, logical order and patient debugging. A mistake is not the end of the activity; it provides information about what to change. Screen-free alternative: Create a floor grid and ask one child to act as a robot while teammates arrange forward, turn and repeat command cards. 9. Marble run engineering challenge Best for: Ages 7–14 Station time: 20–30 minutes STEM focus: Gravity, momentum, speed and mechanical design Materials: Cardboard tubes, folded card tracks, tape, cups, blocks, books, marbles and a stopwatch. A reusable mechanical marble run can also serve as a demonstration model. Set a goal: longest running time, successful obstacle course or accurate finish in a target cup. Ask teams to sketch the route before building. Construct the starting ramp, curves and supports, then release one marble. Observe where the marble stops, jumps or moves too quickly. Change one part of the track and test again. What children learn: A steeper starting point increases speed, while curves and friction change the marble’s motion. The challenge makes engineering visible because every adjustment produces an immediate result. Take the experiment further: Families looking for a more advanced engineering project can explore the ROKR Marble Spaceport Marble Run 3D Wooden Puzzle. Its tracks, ramps and mechanical components provide another engaging way to investigate gravity, momentum and motion. Always follow the product’s recommended age guidance and assembly instructions. Extension: Add a switch, seesaw, spiral or two possible routes. Older children can time several trials and calculate an average. Safety: Marbles are a choking hazard and should be kept away from young children. Use a contained testing area so marbles do not roll into walkways. 10. Design a parachute Best for: Ages 7–13 Station time: 15–25 minutes STEM focus: Gravity, drag, surface area and experimental variables Materials: Tissue paper, lightweight fabric or thin plastic, string, tape, scissors, paper clips, small cups and a stopwatch. Cut a canopy and attach equal-length strings at evenly spaced points. Connect the strings to a small cup or paper-clip weight. Drop the parachute from a consistent, adult-approved height. Time the descent and observe whether the canopy opens evenly. Change the canopy size, shape, material or payload and test again. What children learn: A parachute increases air resistance, or drag, which slows the fall. Fair comparisons require teams to keep the drop height and payload consistent while changing only one design feature. Extension: Challenge teams to carry the greatest payload while remaining in the air for a minimum amount of time. How to make STEM night more interactive Give families a STEM passport. Add a stamp or sticker after each completed station. Use prediction boards. Ask participants to vote on what they think will happen before a public test. Create redesign time. The most valuable learning often happens during the second attempt. Display question prompts. Encourage adults to ask why, what changed and what could be tested next. Offer several kinds of recognition. Celebrate teamwork, creativity, careful measurement and improvement. Add a take-home challenge. Provide a one-page activity families can repeat using household materials. Photograph designs, not only winners. A gallery of different solutions shows that engineering problems can have multiple successful answers. STEM night safety checklist Assign an adult or trained volunteer to every activity involving sharp tools, raw eggs, balloons, elevated drops or small parts. Ask families about latex and food allergies before choosing materials. Keep scissors, toothpicks, marbles and broken balloon pieces away from younger children. Use masking tape on floors to mark launch lines, drop zones and walking routes. Sanitise tables and hands after activities involving food or raw eggs. Test digital devices, cables and charging arrangements before participants arrive. Provide accessible versions of activities for children with different motor, sensory and communication needs. Check all venue and school safety requirements before the event. Frequently asked questions What age is best for a family STEM night? Most of these activities work well for children ages 6 to 14, but each can be simplified or extended. Younger children benefit from pre-cut materials and adult assistance, while older children can work with stricter limits, calculations and multiple variables. How long should a STEM night last? A school or community STEM night usually works well at 60 to 90 minutes. This gives families enough time to visit four to six stations without rushing. A home STEM night can last 30 to 60 minutes. How many activities should we include? Choose four to six activities for a medium-sized event. Fewer well-prepared stations are usually better than many tables with long queues, missing materials or unclear instructions. Are STEM night supplies expensive? They do not need to be. Paper, tape, straws, cardboard, string, cups and recycled containers can support many effective STEM challenges. Reusable trays, measuring tools and signs can be stored for future events. Should parents participate in the activities? Yes. The purpose of a family STEM night is shared exploration. Adults should ask questions, test ideas and help with safety while allowing children to make key design decisions. How do we manage different ages at the same station? Use one basic challenge and provide optional extension cards. Younger children can focus on building and observing, while older children measure results, change variables, calculate averages or work under material constraints. What if a child’s design fails? Treat failure as test data. Ask what happened, which part worked and what one change could improve the next attempt. Avoid rebuilding it for the child; the redesign process is where much of the learning occurs. Can these activities be used at home? Yes. Every challenge can be adapted for one family. Choose one or two activities, prepare the materials together and let each person build a different solution or improve the same design over several rounds. Make curiosity the goal of your STEM night The best STEM night activities are not necessarily the most complicated. They give children a clear problem, room to make decisions and permission to learn from an imperfect first attempt. Keep exploring STEM at home: Discover more hands-on engineering projects in our wooden marble run collection, where building, testing and problem-solving become part of the fun. Start with a manageable number of stations, test the materials beforehand and encourage adults to participate through questions rather than answers. Whether families build a straw bridge, launch a balloon rocket or debug a short program, they leave with something more valuable than a finished project: the confidence to keep asking, testing and trying again.